SOFOS 360
Spaces overview
This screen gives an overview of all the spaces in your system. Using the dropdown menu "Tree" (tree view) or "List" you can select the way the spaces are presented.
"Tree" shows the spaces in a tree structure in a reciprocal context. The spaces that are listed "below" another space are also shown in this way in the overview. Using the triangles on the left side of the line (and), you can collapse the "Tree" to the level of the line.
"List" shows the same spaces but now in a grid as you will find it in other places in SOFOS 360®. In This overview, the spaces are not shown linked to each other and are shown according to the sorting or grouping order. Unlike the "Tree" overview, you can sort, group, or filter this list in many different ways, and you can choose additional columns.
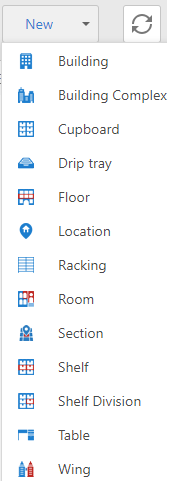 |
The "New" button allows you to create a new space. The arrow on the right () allows you to choose the type of space you are going to create. Each type of space has certain properties that belong to that type of space. For example: a Room has properties like protection level and a room number, and a Location has an address. With the exception of a location, each space must be linked to another space. You can do that while creating the space or by selecting a space in the listview. In the latter case, the selected space is already filled in the "linked to" field. If you do not choose a specific type of space when creating an new one, the most recently used type of space is created by default. The spaces are classified in SOFOS 360® at a 'level'. A Location is always the starting point when you create spaces (parent level), but for the PGS 15 ccheck this is the lowest level. In the listview you will find the available spacetypes in alphabetical order when you hover over the button "New". After you have created the Location, you can organize the remaining space(type)'s as you see fit in terms of level. What you should pay attention to when creating a space, other than a location:
|