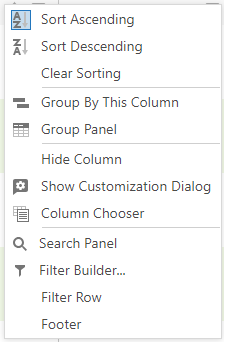
Column headings display multiple options above a grid. A variety of factors influence whether or not these options are available:
- The type of data shown in the grid.
- Right granted to you by the application manager.
- The status of this data.

- New
You can make a new record. Normally, a detail screen will appear, allowing you to enter all relevant information. In some cases, such as with substances, the language selection and name appear first. - Delete
This allows you to remove one or more records. You will be asked whether you are certain you want to remove these records to avoid unintentional changes. - Edit
Allows you to edit a record. - Refresh
You can refresh the data on the screen, for example, if your colleague has just changed something and you have not seen it yet. After clicking this button, you will see the adjustment. - Restore
You can adjust the screen to your preferences (personalize). Once completed, use this button to reset the screen to its default settings. - Help
This will direct you to the help screen. - Export
You can export all the data in the grid to different formats like Excel, Word, and PDF from this page.
Please note that you cannot choose which records to export. All records in the grid are exported to the format you specify. For example, if you notice at the bottom that there are four pages with 20 records each, all 80 records will be exported. - Show Report
If you pick one or more records and have created one or more reports in which you want to include the line(s) (for example, Substance or User), you can display the selected lines in the report. If multiple reports exist, an arrow on the right () will allow you to select which report to run. If you click directly on the button, the report at the top will display. - Search text
If you want to search for something, input it here. It will scan all accessible columns to check whether the system can find any data with the provided text. The search text may thus be in the middle of a word or number. In the case of substance, article, and pot overviews, you can specify which column the search term refers to. Using this options often will speed up the search process.
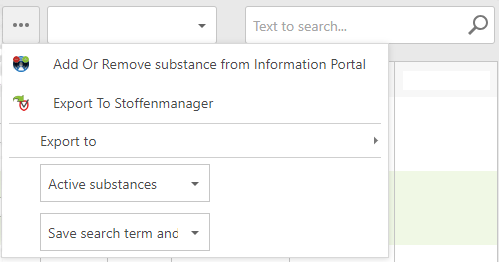
You may notice a number of dots in the bar. ....This indicates that the space above the screen is insufficient to display everything. These dots cover additional options. By clicking on these dots, more options will be displayed below, from which you can choose.
It is possible for each user to choose the behaviour that should be displayed when the search screen opens. You can select from four options:
- Save the search term and show all if no search term (this is the default behaviour of overview screens)
- Do not save the search term and show everything if no search term
- Save the search term and show an empty list if no search term
- Do not save the search term and show an empty list if no search term
A drop-down list 'behind the dots' above the overview allows you to change its behaviour. This can be set for each overview screen. The option affects both the search term input at the top right and the filter, which can be entered via the filter row.
If you chose option 3 or 4, no data will be shown on the screen when no search term was entered. The list is empty. The list will only be filled based on the search term or filter entered. When you close the screen and then reopen it, the search term you entered is applied to the list again when you have chosen option 3 and will be empty when you chose option 4 (the search term is cleared as well).